Add Custom Pull-Quotes to Divi (aka Blockquotes)
By Divi Dude
You may know pull-quotes as the newspaper term “Cut-Quote,” or as they’re called in WordPress’s Guttenberg “Blockquote” or the client term “Really Big Quote Thingy.” They’re all the same thing.
There are several ways we can go about designing pull-quotes. We can use the Blockquote button in the MCE that comes with WordPress’s Guttenberg text box; or we can use Divi’s Visual Builder to design the pull-quotes using modules such as Text or Blurb; or we can use the Quote Shortcode that comes with Divi. I don’t find that one too useful, so I’m going to skip that one.
If you scroll near the bottom of the page (at the very bottom of this write-up, there is a YouTube video in case you’d rather watch that.
Using Blockquote Button in WordPress
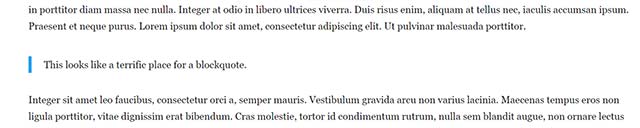
Let’s get started with WordPress’s Blockquote button. Here’s a picture of what it looks like straight out of the box:
blockquote {
    margin: 20px 0 30px;
    padding-left: 20px;
    border-left: 5px solid;
}
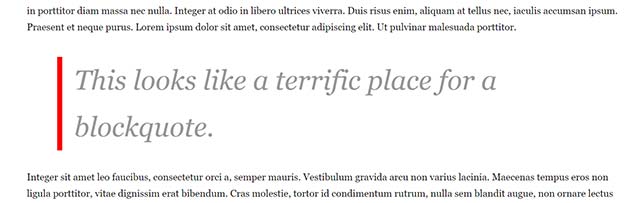
We’ll start with the basics and give the border a color of red and make it a bit thicker. Also, we’ll want to adjust the margins to move it further and add a bit of padding so it’s not so close to the left border. This is what we end up with:

blockquote {
    margin: 20px 50px 30px;
    padding-left: 20px;
    border-left: 8px solid #ff0000;
}blockquote p {
}blockquote {
margin: 20px 50px 30px;
padding-left: 20px;
border-left: 8px solid #ff0000;
}
blockquote p {
font-size: 45px !important;
line-height: 1.5;
color: #999 !important;
font-style: italic !important;
}
In our case above we have one border. What if we wanted to add two borders? Then we’d simply copy and paste the border code and change it to border-right, so we have both a left and right.

blockquote {
    margin: 20px;
    border-left: 8px solid #ff0000;
    border-right: 8px solid #ff0000;}
blockquote p {
    font-size: 45px !important;
    line-height: 1.5;
    color: #999 !important;
    font-style: italic !important;
	text-align: center;
}
If you prefer to have the pull-quote borders on the top and bottom, then simply change the border-right and border-left to border-top and border-bottom. Make sure to include border-left: none;

blockquote {
    margin: 20px;
    padding: 20px;
    border-left: none;
    border-top: 8px solid #ff0000;
    border-bottom: 8px solid #ff0000;}
blockquote p {
    font-size: 45px !important;
    line-height: 1.5;
    color: #999 !important;
    font-style: italic !important;
    text-align: center;
}
Pull Quote with Curved Left and Right Borders
Let’s get back to the right and left borders.
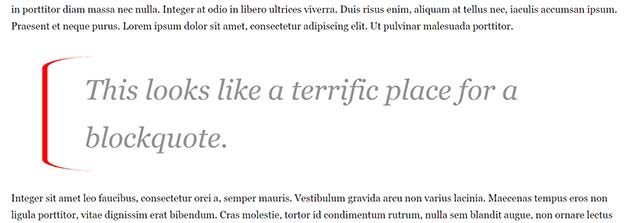
One of the things I really like to do is to take my straight line and make it curve. To do this, we simply add a border-radius, like this:
blockquote {
	margin: 20px;
	padding: 20px;
	border-left: 8px solid #ff0000;
	border-right: 8px solid #ff0000;
	border-radius: 25px;
}
blockquote p {
	font-size: 45px !important;
	line-height: 1.5;
	color: #999 !important;
  	font-style: italic !important;
	text-align: center;
}
Again, you can play around with only using one border or top / bottom borders.
Create a Funky Shaped Border for Pull-Quote
You want to start getting some pretty unique shapes, try changing the border radius from pixels to a percentage. Here’s what happens when we change the border-radius from 25px to 10%.
blockquote {
	margin: 20px 50px 30px;
	padding: 15px 60px;
	border-left: 8px solid #ff0000;
	border-radius: 10%;
}
blockquote p {
	font-size: 45px !important;
	line-height: 1.5;
	color: #999 !important;
	font-style: italic !important;
}
Put a Pull-Quote in a Box
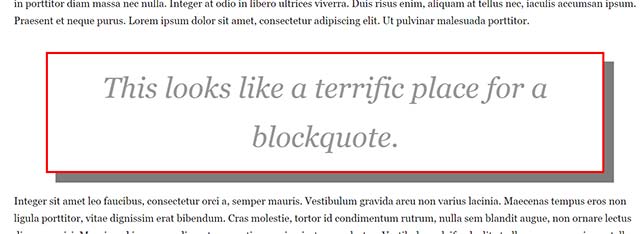
One of the things I really like to do is set my pull-quote apart from the rest of the text by encasing it in a box and adding a solid drop-shadow behind it. So here, we’re going to add borders all the way around the quote. Notice how we removed the left or right designation, and just use the word “border?” When there is only one size option, then borders are drawn all the way around. To add the drop shadow, we add a box-shadow element to our CSS. (see this tutorial for how to create box shadows). Play around with these numbers to get the look you like (the first 3 numbers have to do with the X and Y radius, and the feathering. The numbers in the parenthesis are the rgba values (the “a” being the opacity)).
blockquote {
    margin: 20px 50px 30px;
    padding: 15px 60px;
    border: 3px solid #ff0000;
    box-shadow: 15px 15px 0px rgba(125,125,125,1);
}
blockquote p {
    font-size: 45px !important;
    line-height: 1.5;
    color: #999 !important;
    font-style: italic !important;
    text-align: center !important;
}
Adding a Colored Background to Pull-Quote
All these examples used the color of the background from your post. What if you wanted to change the color? Well, that’s simple, just add a background element.
Here’s an example of a basic pull-quote with a reddish-grey background.
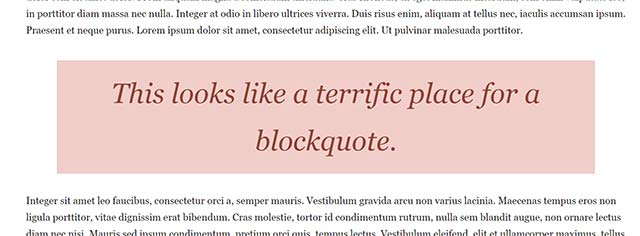
A couple of things to note in the code below. We added a border:none because the original code that comes with Divi has a border in it (and we need to remove it). We also changed the color of the font, just to show it can be any color you want.
blockquote {
    margin: 20px 50px 30px;
    padding: 15px 60px;
    background: #f0cec9;
    border: none;
}
blockquote p {
    font-size: 45px !important;
    line-height: 1.5;
    color: #914436 !important;
    font-style: italic !important;
    text-align: center !important;
}Creating an Oval Pull-Quote
Remember how above we added curvatures to the border lines on left and right? What if we wanted our quote to appear in an oval shaped border? Simply add a border all the way around your pull-quote and then change the border radius to 25% or 50% (or play with these values to get something you like).
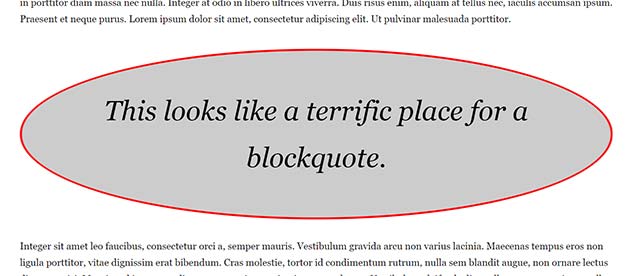
And here’s the code used:
blockquote {
    padding: 60px;
    border: 3px solid #ff0000;
    border-radius: 50%;
    background: #ccc;
}
blockquote p {
    font-size: 45px !important;
    line-height: 1.5;
    color: #000 !important;
    font-style: italic !important;
    text-align: center !important;
}
Don’t Forget the Media Query
One thing I forget a lot is to discuss the changes for mobile and tablet. To do this, you have to add a Media Query. And since seemingly every phone and every tablet has its own size, thus making getting the Media Query just right is difficult. You can do as many as you feel is necessary, but for the purpose of this tutorial I will be including media queries for some of the screen break points Divi uses.
I will use the Oval shaped pull-quote we just did. We will use the same Blockquote Blockquote P classes we just used, but this time insert them inside a Media Query. We will make one for a screen sized between 768px and 980px (i.e. Tablet), one for screens 480px and 768px (i.e. Cell in turned Landscape), and then one for screens 479px and smaller (i,e, Cell turned Portrait).
We use @media screen and tell minimum and maximun width of the screens we want the CSS to apply to . Then I simply copy the CSS code and insert it between {} and then changes to the variables that I need to. Usually, this will be font-size, padding and margins.
In my example below I added a margin to the Blockquote p class as it needed it. But play around with your own settings to get what you like.
blockquote {
    padding: 60px;
    border: 3px solid #ff0000;
    border-radius: 50%;
    background: #ccc;
}
blockquote p {
    font-size: 45px !important;
    line-height: 1.5;
    color: #000 !important;
    font-style: italic !important;
    text-align: center !important;
}
@media screen and ( min-width: 769px ) and ( max-width: 980px ) {
blockquote {
    padding: 10px;
    border: 2px solid #ff0000;
    border-radius: 50%;
    background: #ccc;
}
blockquote p {
    font-size: 30px !important;
    margin: 15px;
    line-height: 1.5;
    color: #000 !important;
    font-style: italic !important;
    text-align: center !important;
}}
@media screen and ( min-width: 480px ) and (max-width: 768px) {
blockquote {
    padding: 20px;
    border: 2px solid #ff0000;
    border-radius: 50%;
    background: #ccc;
}
blockquote p {
    font-size: 25px !important;
    margin: 15px;
    line-height: 1.5;
    color: #000 !important;
    font-style: italic !important;
    text-align: center !important;
}}
@media screen and (max-width: 479px) {
blockquote {
    padding: 20px;
    border: 2px solid #ff0000;
    border-radius: 50%;
    background: #ccc;
}
blockquote p {
    font-size: 25px !important;
    margin: 10px;
    line-height: 1.5;
    color: #000 !important;
    font-style: italic !important;
    text-align: center !important;
}}
Wrapping Up This Tutorial
So that’s a lot of different ways you can stylize the pull-quote using the blockquote CSS that comes with WordPress.
If you’re like me, you often times use Divi’s modules instead of Guttenberg. If that’s the case, and you see a style you like, use the Blurb module (my favorite to use) and then just stylize that module to act like a blockquote. I show an example of this in the YouTube video using the Text Module.
See the Pull Quote Tutorial on YouTube
I created a video on YouTube going over everything I have written here. so if you prefer to watch the video instead of reading the text, then here it is.

Must Have Plugins


Faster WordPress Hosting

Affordable Domain Registration
Get $1.00 off.
DiviDudeWeb16

Favorite WordPress Theme

Start Your Newsletter

For Your Inner Nerd

Affiliate marketer: Which means when you click a link and purchase an item, I may receive a commission.
More From Divi Dude

MailerLite is an affordable, easy-to-use newsletter and email marketing platform
For the longest time I used MailChimp. I was drawn to the 2,000 free subscribers.
But when MailChimp changed how they defined subscribers and made some other not so user friendly changes, I started looking for alternatives. Not just for the free tier, but for my paid subscriber lists (I have clients that send out newsletters and they need more bang for the buck than what many free tier offers).

Code Snippet Syntax Highlighter that Works with Divi – Review
This is one of those plugins that’s only going to appeal to a certain number of people. People like me who have a need to add syntax code to websites. But if you’re one of those people, then I recommend you get the plugin — Divi Code Snippet Module — from the creator of Divi Booster. I tried 3 or 4 plugins in WordPress, every one of them …
