How to Add Fonts in Divi
By Divi Dude
Finding Fonts to Use with Divi
Before you add any fonts to your website, I guess you should find some fonts you want to use. With Divi from Elegant Themes you can use True Type (.ttf), Open Type (.otf), or Embedded Open Type (.eot), or Web Open Font Format (.woff / .woff2) fonts. Check with your fonts licenses before uploading to your website to make sure you can upload it legally.
In the video, the example font I use is Boycott, which I found on 1001 Free Fonts website. It is free to use, so I thought it would be a good font to use as a sample.
Upload Your Font Via Divi’s Design Tab
One method for adding a new font to your Divi website is via the Design tab found within your module. Just click on the tab, choose any one of the expandable fields that has fonts (i.e. text, heading, body copy) and in the font selection drop down, you’ll see a button that allows you to upload a font. Press the button, then navigate to where the font you want to upload is and upload it. Now, you’ll see the font has been added. Simply choose the font when you want to use it. It’s really easy. But there’s an even easier way…
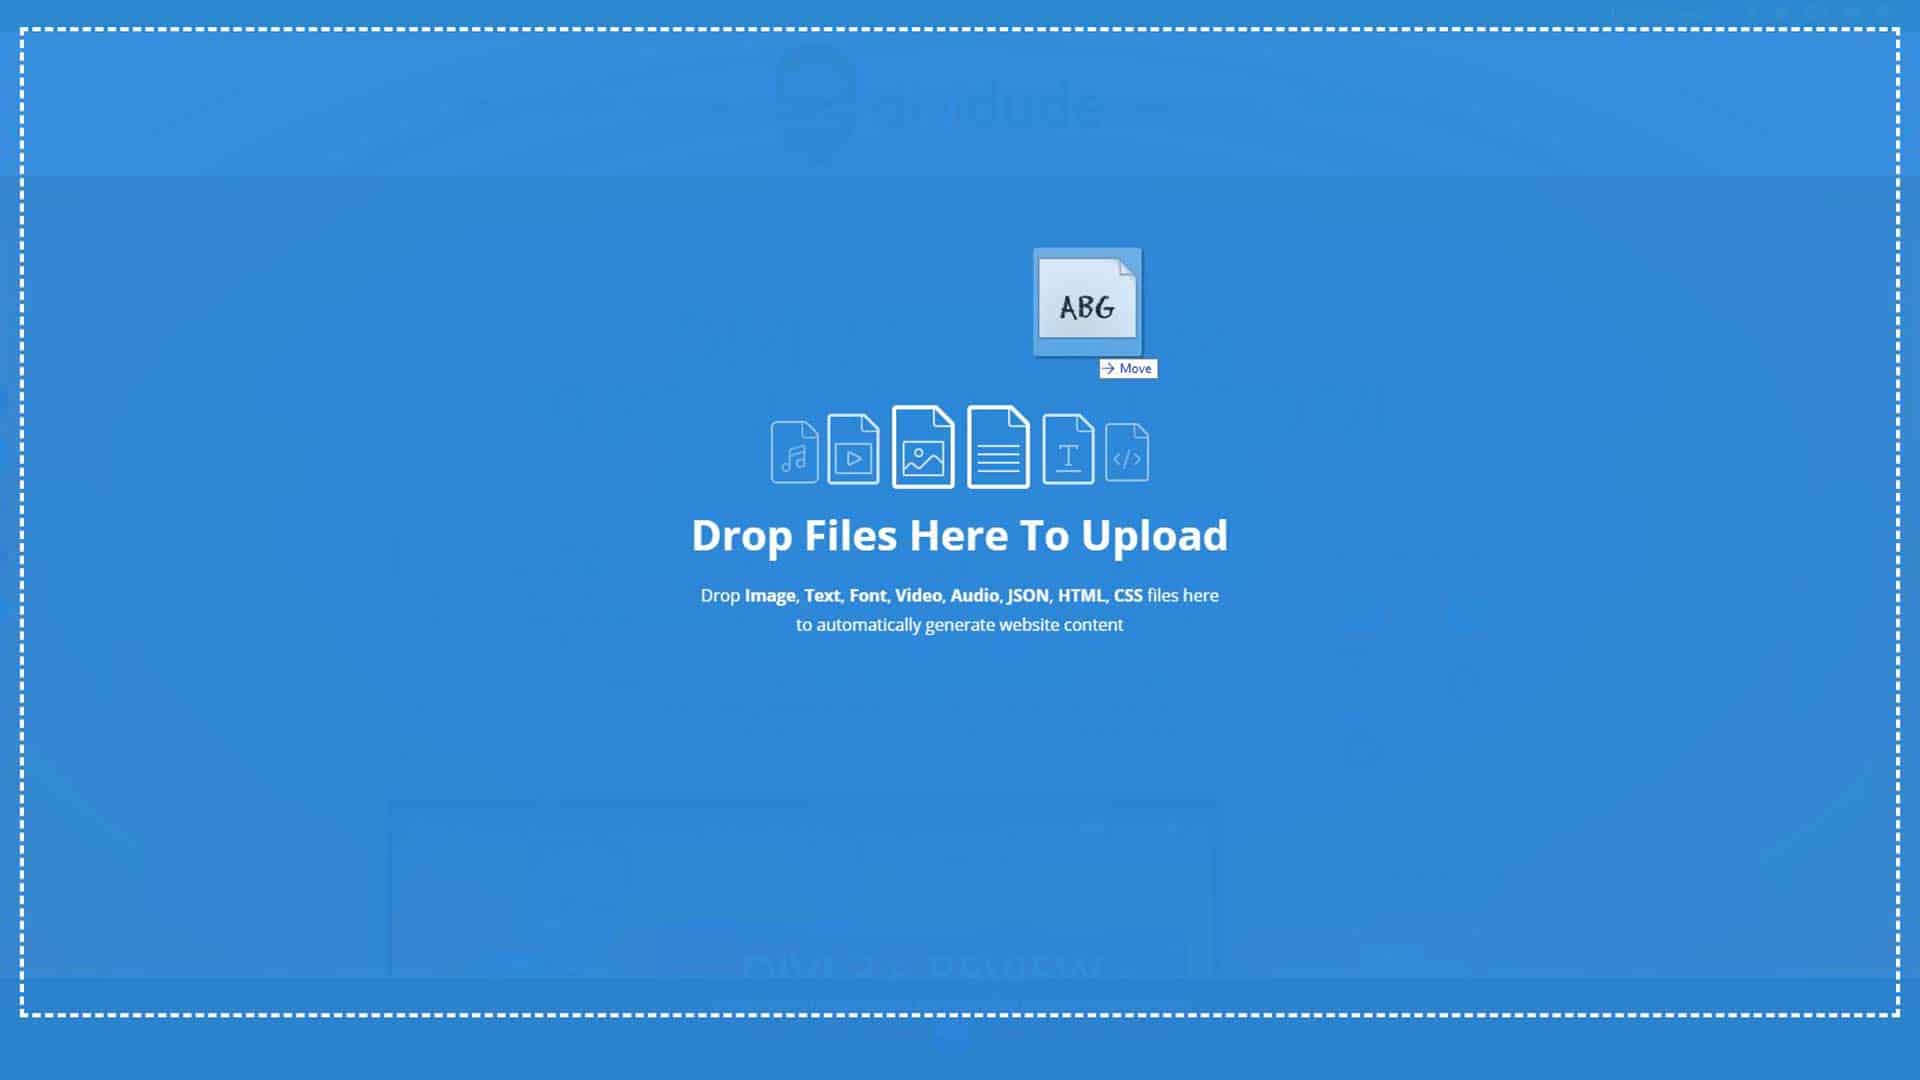
Add Your Font with Divi’s New Drag and Drop Method
… and the easier way is to just drag and drop it into the Visual Builder. Open up the Visual Builder and go to your computer and find the font you want to use with File Explorer and select it with your mouse and while holding down the button drag it over the screen with the Visual Builder open and the screen will change color with a message about Dragging and Dropping. (see picture). Now simply let go of the mouse button and Divi will automatically install the font for you. Now when you go to choose a font for header or body copy or where ever you choose fonts, you will find the font you added will be there. Pretty cool and easy, eh?
Must Have Plugins


Favorite WordPress Theme

Start Your Newsletter

Latest Divi Dude Tutorials

Divi Essential Is A Useful and Time Saving Plugin
I just got my license for Divi Essential and it may be my new favorite go to Divi plugin. (yes, I still love Divi Booster and recommend everyone get it).
Sure, you could manually do most of the things Divi Essential offers, but not with the speed and lack of hair pulling that this terrific plugin offers.

Divi Introduces Better Responsive Screen Size Previewing
With the introduction of Divi 4.7, responsive previews got a major upgrade. Whereas before you were captive by the desktop, mobile and tablet screen resolution sizes Divi thought you should be previewing, you are now able to view custom responsive screen resolution sizes of your choosing.

MailerLite is an affordable, easy-to-use newsletter and email marketing platform
For the longest time I used MailChimp. I was drawn to the 2,000 free subscribers.
But when MailChimp changed how they defined subscribers and made some other not so user friendly changes, I started looking for alternatives. Not just for the free tier, but for my paid subscriber lists (I have clients that send out newsletters and they need more bang for the buck than what many free tier offers).
Affiliate marketer: Which means when you click a link and purchase an item, I may receive a commission.
More From Divi Dude

Delete Spam Comments in Bulk Without Plugin on Cloudways
Sometimes you screw up and forget to turn off comments on your WordPress website, or forget to configure your Askimet, or do both, and then you end up with thousands of comments that are nothing but spam. We’re talking hundreds of pages worth of comments that need to…
MailerLite is an affordable, easy-to-use newsletter and email marketing platform
For the longest time I used MailChimp. I was drawn to the 2,000 free subscribers.
But when MailChimp changed how they defined subscribers and made some other not so user friendly changes, I started looking for alternatives. Not just for the free tier, but for my paid subscriber lists (I have clients that send out newsletters and they need more bang for the buck than what many free tier offers).
Delete Spam Comments in Bulk Without Plugin on Cloudways
Sometimes you screw up and forget to turn off comments on your WordPress website, or forget to configure your Askimet, or do both, and then you end up with thousands of comments that are nothing but spam. We’re talking hundreds of pages worth of comments that need to…
